With the drag and drop landing page builder, you can easily create customized landing pages to promote content, engage your readers, and boost your SEO.
Create new landing page layouts or copy your existing layout as "templates."
----------
To demonstrate, we'll copy a basic page layout. In this case, we'll start with a page layout named "Simple 1." For many clients, this layout was already on their site when they started Metro Publisher.
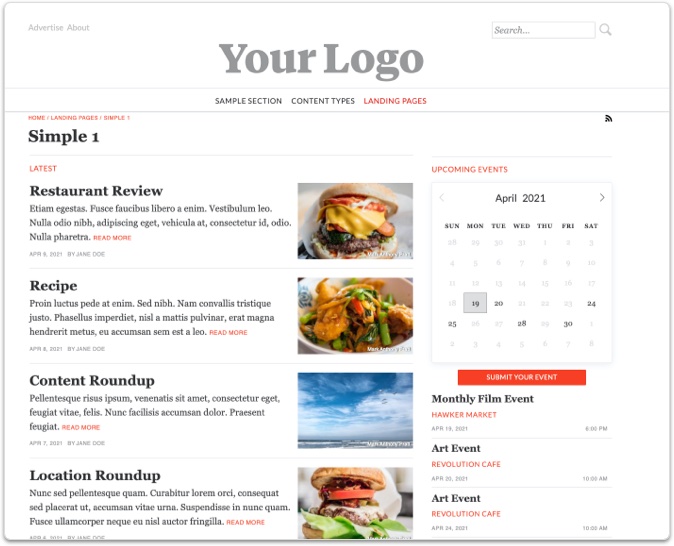
Simple 1 Layout
1. Copy an Existing Section Layout
Get started by first making a new section or subsection.
- Log in as an Admin.
- Go to "Sections" and create a new section or subsection.
- Once you've saved, you'll see where it says "Layout Versions" it is empty.
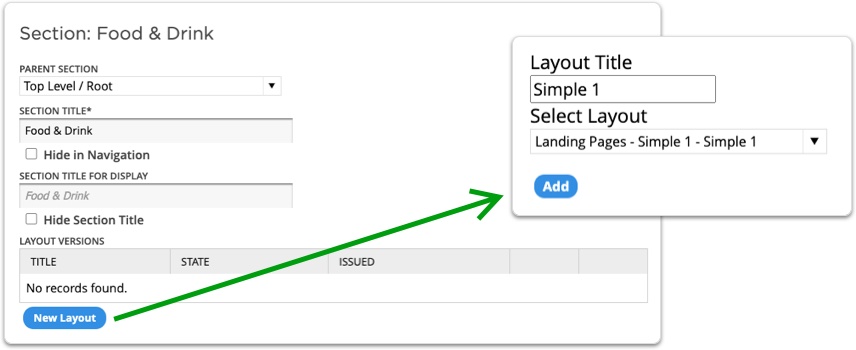
- Click "New Layout."
- Then add a title. You might want to name your layout something that is descriptive of what it is like or how it would be used. In this case, I'm copying an existing layout called "Simple 1" so I'll give it the same name. NOTE: You can change the layout name later if you need to.
- Select one of your existing layouts and select "Add."
----------
2. Edit the Copied Layout
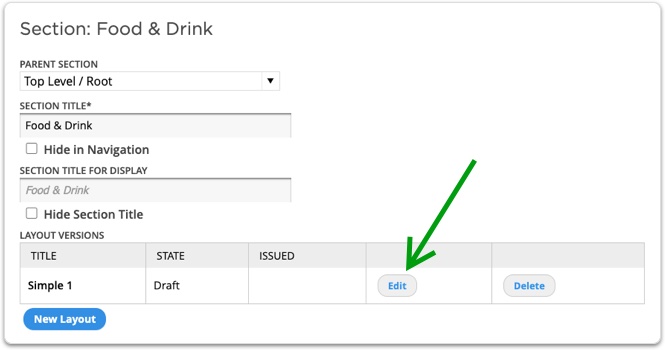
- You'll see your section was created and is in "Draft."
- Click the "Edit" button to make any changes.
----------
3. Modify the Sprockets
The layout is an exact copy of the containers and sprockets. Beware of changing the sprockets. Any changes here will be seen wherever these sprockets are being used elsewhere on your site. If you want to change aspects of the layout, you should first copy any sprockets you want to change.
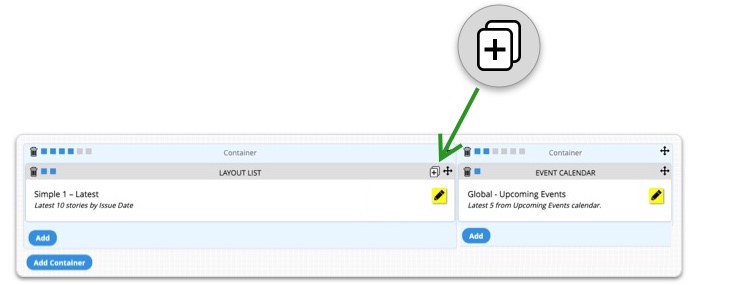
In this case, I want to change only the latest stories in the "Simple 1 - Latest" sprocket.
- Find the sprocket in the layout and click the copy icon.
----------
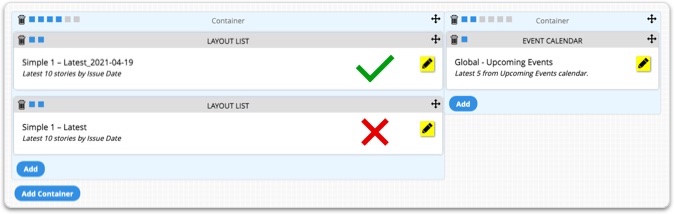
- You'll see a copy of that sprocket within the container directly above. The date has been added to the title to differentiate it from the original.
- Click the pencil icon to rename the sprocket something that makes sense to you and make any necessary edits.
- Remove the original sprocket by clicking the garbage can icon.
Comments