Adding & Validating Your Twitter Account
Twitter cards make it possible for you to attach media experiences to Tweets that link to your content. To activate this feature, you will need to do a few things:
1. Add Twitter Username
First, you will need to add your Twitter username to your Metro Publisher works site. followers.
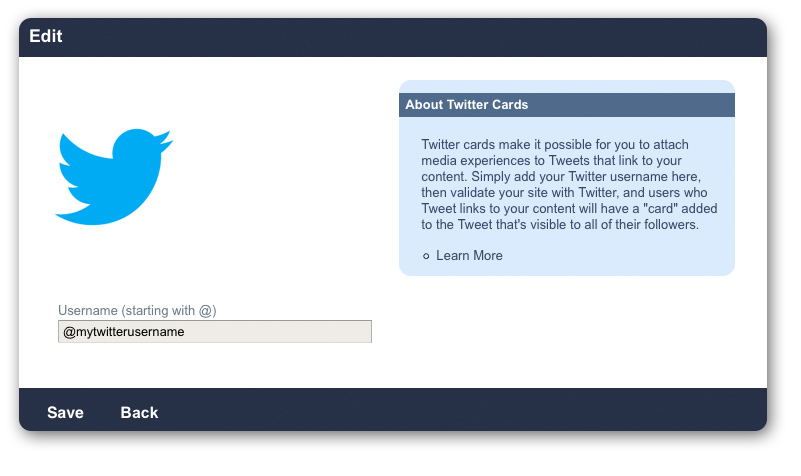
- Log in to your Metro Publisher work site as an "Admin."
- Go to 3rd Party > Twitter Cards
- Paste in your Twitter username. Example: @mytwitterusername
- Save
2. Validate Your Website with Twitter
Next, you must validate your website with Twitter.
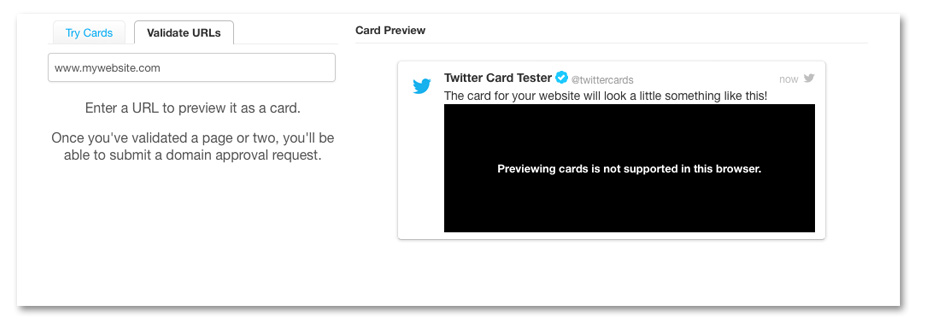
- Go to https://dev.twitter.com/docs/cards/validation/validator
- Click on the tab "Validate URLs."
- Type in your website URL and press enter
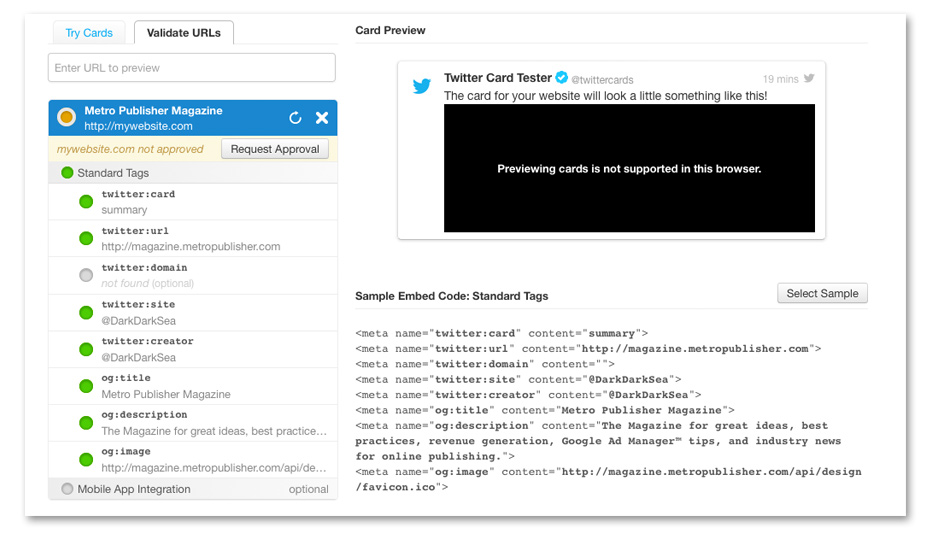
- Click "Request Approval"

- Fill out form and Submit. Be careful to fill out the entire form. There are fields below the fold that need to be filled out as well.
- Click "Register Domain."
NOTE: The approval process can take a long time. This is the message most people get:
"Request Received
Thanks for applying to be part of Twitter's cards service. We'll review your request as soon as possible. Expect a few weeks for turn-around time. You will receive an email when your request has been reviewed."
Twitter Card Types
A short guide on how to create twitter cards in MetroPublisher.
Twitter currently allows 4 types of cards:
- Summary card
- Summary card with Large Image
- Player Card
- App Card
Metro Publisher allows adding twitter cards for most content types. In particular: Summary cards are created automatically for most content types. Player and App card can be created for articles, events, location searches and event searches. Locations cannot currently have Player and App card. Here is a summary of the currently supported cards by content type.
| Content type | Summary cards | Player/App cards |
| Article | Yes | Yes |
| Location | Yes | No |
| Event | Yes | Yes |
| Location searches | Yes | Yes |
| Event searches | Yes | Yes |
| Sections | Yes | Yes (Pro) |
| Pages (HTML) | Yes | Yes |
| Location roundup | Yes | No |
| Location review | Yes | No |
| Topic page | Yes | No |
General settings:
If you insert your twitter account in the general settings, Metro Publisher will automatically generate the basic Twitter metadata tags inside the HTML for the main content types (articles, locations, events, pages, locations and event searches).
You can insert the specific metadata (meta-title, description, keywords, teaser image) in the corresponding content edit page. This option will enable Twitter to find the Summary Card metadata (simple or with large images).
If you have not activated the Twitter Cards option in 3rd Party Settings, Twitter will try to use the opengraph tags to generate a Summary Card. Thus, if you insert the metadata and opengraph fields for the content, that is the data that will be shown in the Twitter summary card. If you don't specify metadata, the system will use the main fields (ex. title and description).
Additional settings for Player and App cards:
Player and App cards require additional fields (ex. the url for the media resource, or the app download) which need to be inserted manually. You can insert these fields manually into the content.
1. Prepare the twitter code:
This is an example of the code for a Player Card. Here you can check which fields are mandatory and which are optional: Twitter Player Card
<meta name="twitter:card" content="player"/>
<meta name="twitter:creator" content="@myuser"/>
<meta name="twitter:site" content="@myuser"/>
<meta name="twitter:title" content="my title"/>
<meta name="twitter:description" content="my description"/>
<meta name="twitter:image" content="http://testsite/test.jpg"/>
<meta name="twitter:image:alt" content="420"/>
<meta name="twitter:player" content="https://www.youtube.com/myvideo"/>
<meta name="twitter:player:width" content="500"/>
<meta name="twitter:player:height" content="300"/>
Here you can check the sample code for the App Card and verify which fields are mandatory and which are optional:
2. Insert the code in the HTML:
The strategy varies for different content types: Twitter App Card
- HTML pages/templates: you can insert the raw code into the Header field.
- Articles, events, location searches and event searches: you can create an embed inside the content, and paste the code into it.
- Sections: you can create an HTML Sprocket and insert the code there.
- If you are a Pro user, you can activate the 'Header field for content' in the admin content settings tab and insert the code there (for articles and sections only).
3. Validate the card:
Use the Twitter Card Validator (https://cards-dev.twitter.com/validator) to make sure that the card is correct and is showing what you expect.
Comments